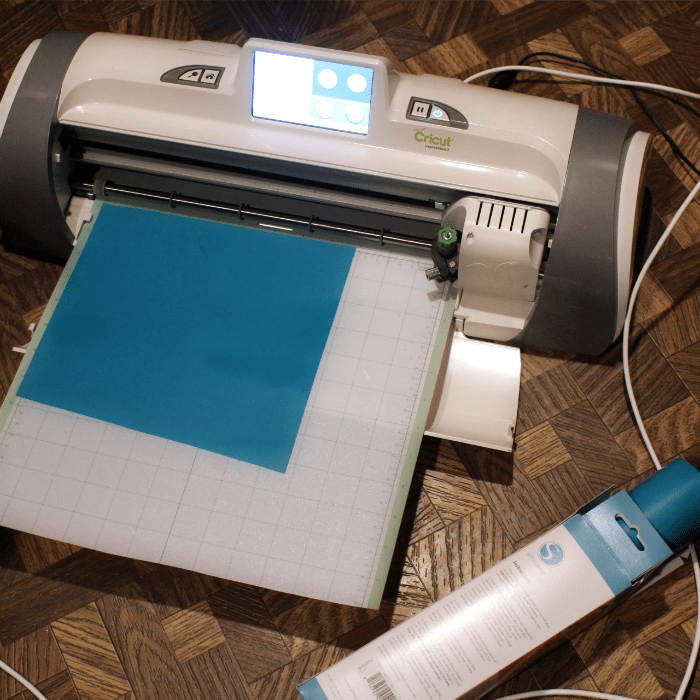
As things heat up this summer, take a break and cool off with this simple and fun
heat transfer project! Iron-on Heat Transfer Material is easy to use, and the creative possibilities are endless!
A few weeks ago my family and I were invited to a charity kids fishing tournament on a lake. Family, food, fun and all for a great cause! I decided to make the kids fun shirts for the event. I had never used
heat transfer before, but it was
sooooo simple!
Here are the steps I used and some helpful hints along the way!
For this project I used my Cricut Expression 2 die-cutting machine. I connected my machine to my computer and opened the Cricut Craftroom.
Step 1: Design! Using the Cricut Craftroom I designed a simple font saying ‘Splish Splash’. I used the Cricut Craftroom because I wanted to weld my letters together to create one cut rather than having to iron on individual letters. Simply place your letters onto your design area and play with the angles and size. Don’t forget, overlap your letters just a hair so they weld together.
Step 2: Flip! Once your saying is finished, drag your cursor over the entire image to select the entire saying. Then on the top tool bar click > Flip< to reverse your image.
Step 3. Cut! Once your image is flipped (above) you are ready to cut! Place your iron-on onto your cutting mat SHINY SIDE DOWN! This is very important. The heat transfer has a clear plastic coating on one side and this will be face DOWN on your mat.
TIP: I used a deeper cutting setting and cut the image twice just to make sure it cut clean and all the way through.
Step 4. Peel! Once your image is cut, peel off the negative heat transfer (both layers) leaving your image on the mat.
TIP: I used my Westcott Craft Knife to help pick the small areas of the material off of the mat. The super sharp and fine point is great for getting into those small cracks and areas such as the inside cuts on letters like A & P.
Once your negative ‘garbage’ is out of the way, carefully peel your image off of the mat (both layers). When peeling it off, be careful not to separate the layers!
Here is the cut after I pulled it from the mat. Your image will be shiny on one side and dull on the other. At this point, your cut is ready to be ironed on!
(I do apologize, I am going to switch to using a fish design, but these next few steps are exactly the same with any cut that you do.)
Step 5: Iron! Position the design on the desired surface face down so that the shiny side is facing up. If you are ironing on words, your words and image should now be right-facing.
TIP: Make sure your area and article of clothing is as flat as possible. Like with anything you iron, you want it flat and smooth.
Cover your design with a thin cloth. Place a heated iron (cotton setting, no more than 300 degrees!) on top pressing down firmly onto the design for 45-60 seconds.
TIP: Do not move the iron around. I found it worked much better if you hold the iron in one place with firm pressure. If your design is large, hold your iron down firmly in one area and then move it to the next area a repeat until you have ironed over the entire design.
After you are done ironing, lift your towel and check your design. If you see any edges that did not adhere down, place the cloth back over the design and heat that area again.
Step 6. Peel! Once your design is ironed on completely it’s time to peel! Once your design has cooled, pick and peel off the clear layer on top. (this was just a transfer sheet)
TIP: I found it MUCH easier to peel if the image was cooled completely! If you peel when the design is still hot, you risk pulling off part of the design.
TIP: After I peeled off the clear transfer sheet, I covered the design with the cloth again and ironed over the design one more time just to make sure the design was completely adhered. You only need to iron it for a few seconds.
For the boys we ironed our design onto lime green cotton shirts and it worked great! Here is my niece and nephew, Bella and Charlie, being silly in their shirts.
Here is my little Lauren and her fish jumper! The jean material was a little harder to iron on but with time and some good pressure, it worked great!
She loved matching her cousins! Her face says it all…she loved it!
For the girls, we ironed the designs onto a polyester shirt and it worked FANTASTIC! I could not find anywhere if you can use Heat Transfer on Poly blends, so I just went for it and it worked AWESOME!
With the thinner Polyester material, you actually don’t need to iron as long, it transfers and adheres much more quickly.
Overall the material was super easy to use! If you take your time and do it right, the material is durable and will not come off in the wash. Craft-e-Corner carries an entire line of Heat Transfer in regular and flock and in TONS of fun colors!
I hope you loved the tutorial and all of my tips and tricks along the way! I highly recommend trying
this product. Happy Crafting!
WHAT DO YOU THINK?
*I love hearing your comments and feedback, comment below with your thoughts!*


Leave a comment