On Orders $49+
On Orders $49+


My son LOVES to put Lego sets together. However, if your children are anything like mine, I find Legos EVERYWHERE. For his birthday I decided to make a Lego tray so that he can put all the Legos on the tray as he is putting the set together. I used my Cricut to make a stencil out of vinyl to put his name on the tray.
Materials:
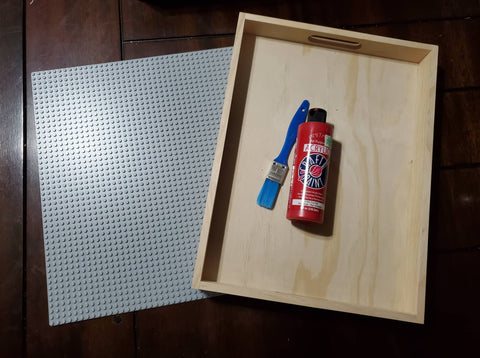
Unfinished wood tray (I got this one at Target)
Lego base plate (15x15)
Paint
Paintbrush
Mod Podge
Glue (I used a hot glue gun)
Utility Knife
Poly or any sealant
Cricut
Cricut tools
Premium vinyl
Transfer Tape

I purchased The Unfinished wood tray from Target. I bought the Lego base plate from Amazon. The Base plates do come in different sizes so be sure to look to see what size it is and if it will work with your tray.

I first started with cutting down my baseplate so that it would fit inside the wood tray. I figured out where I wanted the cut to be made and used smaller base plates to create a line. I made sure to attach it together so that it wouldn’t move on me while I was cutting.

I just took my utility knife and made the cut right down the line that was made by the smaller baseplates. It was much easier than I thought. I was able to put the razor right up against the smaller plates and just make the cut all the way down.

I then painted the tray. I did two coats. I skipped the middle as it would be covered up.

While the paint was drying, I headed over to Design Space to create my stencil. I started with a rectangle shape and sized it just bigger than the side of the tray. I selected text, typed my son’s name, and picked the font that I liked. I placed the text over the rectangle and sized it correctly to fit on the tray side. I selected both the shape and the text and aligned it to the center.

I then reselected both the shape and the text and clicked Slice. This way the name was cut out of my shape. I deleted the layers that were the “extra.”

Then, I hit make it. I selected premium vinyl for my material. You can really use permanent or removable for this project. After it was done being cut out I weeded the letter so that it was a stencil.

I used transfer tape to place the vinyl stencil on the side of the tray.

When using vinyl as a stencil on wood, I always start with a layer of Mod Podge. This fills the gap between the vinyl and the uneven surface of the wood. This will leave a sharper line after the paint. Be sure to brush the Mod Podge on in every direction so that it gets under the vinyl on all sides of the letters.

After the Mod Podge was dry I painted the letters.

I do not let the paint completely dry before taking off the stencil. If the paint dries completely it will stick to the vinyl and it will not come off the tray well.

After the letters were dry I used a Poly finish to seal the entire tray.

When it was completely dry and sealed I used my hot glue gun to place the Lego base inside the tray.
My son loved it and was so excited that he used it immediately to put together a set that he also received for his birthday.
Do you have any Lego fans in your house? These would also make awesome gifts for a birthday party as well!
*Make time to make stuff
~Beth
Matching Child and Doll Shirt with Cricut Iron-on
Leave a comment