
Free Shipping
On Orders $49+
On Orders $49+
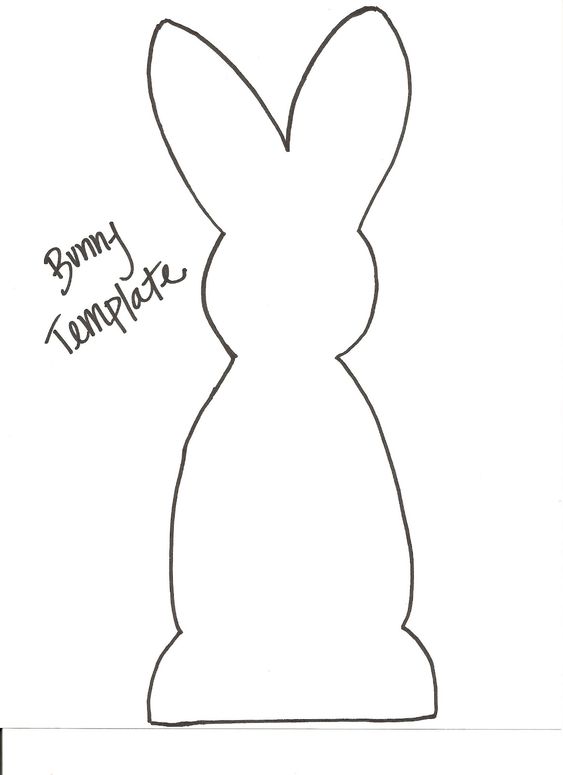
 Easter is just around the corner, so it’s time to get crafting if you haven’t already! I always enjoy decorating my home for the holidays and seasons, but don’t like to spend a lot of money on it since it doesn’t stay out for very long. That’s why I love using my Cricut to make decor! It’s inexpensive (usually) and I can personalize it however I want. Today, I’m going to show you how to make these fabric bunnies. I used my Cricut Maker to cut the fabric and chipboard, but if you don’t have a Maker, you can always cut the fabric by hand and opt out of the chipboard. If you’re new to sewing, you can TOTALLY do this! I’m not a professional sewer by any means – in fact, I still would say I’m a beginner. I promise that if I can do it, you definitely can too! It’s going to seem like you need a million materials and there are a thousand steps, but I promise it’s really simple! Let’s get started.
Materials:
2. Next, design your tags for your bunny. I created the tag in DesignSpace by welding together a square and some triangles. For the text, I wanted it to look old and antique-ish, so I used a typewriter called “Traveling Typewriter”. It’s a free font that I found on www.dafont.com and can be found here. You can create your tags to say whatever you want, but I just simply numbered them like this: 1. 2. 3. 4. Make sure that you click “draw” so that your Cricut knows to write on the chipboard instead of cutting it out!
3. Get cutting! When your cutting your Chipboard, there’s a few things you need to be aware of. First, push your star wheels (the white wheels) all the way to the right on your Cricut. Then insert your knife blade and your Cricut pen/marker. Make sure to apply the chipboard on a StrongGrip cutting mat (the purple one). Cricut recommends using Painter’s Tape or Masking Tape along the sides of your chipboard for extra protection. It definitely helps the chipboard stay in place while the knife is cutting, so make sure you do that! Then hit cut for your chipboard. The knife blade will cut the tags and the pen will draw the numbers on. Once that is done cutting, move your star wheels back, remove the knife blade and replace it with the rotary blade, and remove the marker. Then put your fabric on the FabricGrip cutting mat (the pink one) and cut your fabric out!

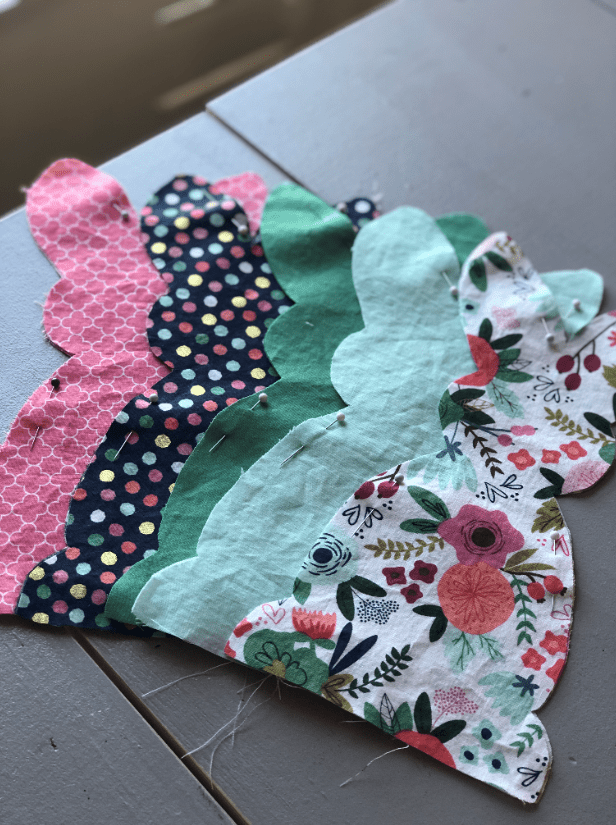
 4. Next, line up the material so that they are together (like the picture below) and use your push pins to attach the fabric together. This will help when you’re sewing to keep the front piece and the back piece lined up together.
5. Now it’s time to sew! You can definitely do this by hand if you want too, but it is much faster on a sewing machine. I like to start on the bottom left hand side of my bunny. Sew a few stitches and then back-stitch over to really secure it. Sew on the edges of your bunny, but do NOT sew the bottom shut – you’ll need room to stuff it in a second here. As you go around the curves, release your presser foot and turn the bunny to easily get around the edges. Remember: when you get to the bottom, do not sew – leave it open! 6. The next step is to stuff your bunny with polyfil! You can be pretty generous with this. I like to use a pen or pencil to help push the polyfill up into the ears of the bunny (this is why I like to make the neck of the bunny a little wider). Once it’s stuffed, go back to your sewing machine and close the bottom shut. Again, when you get to the final edge, do a few back stitches to make sure it’s secure.

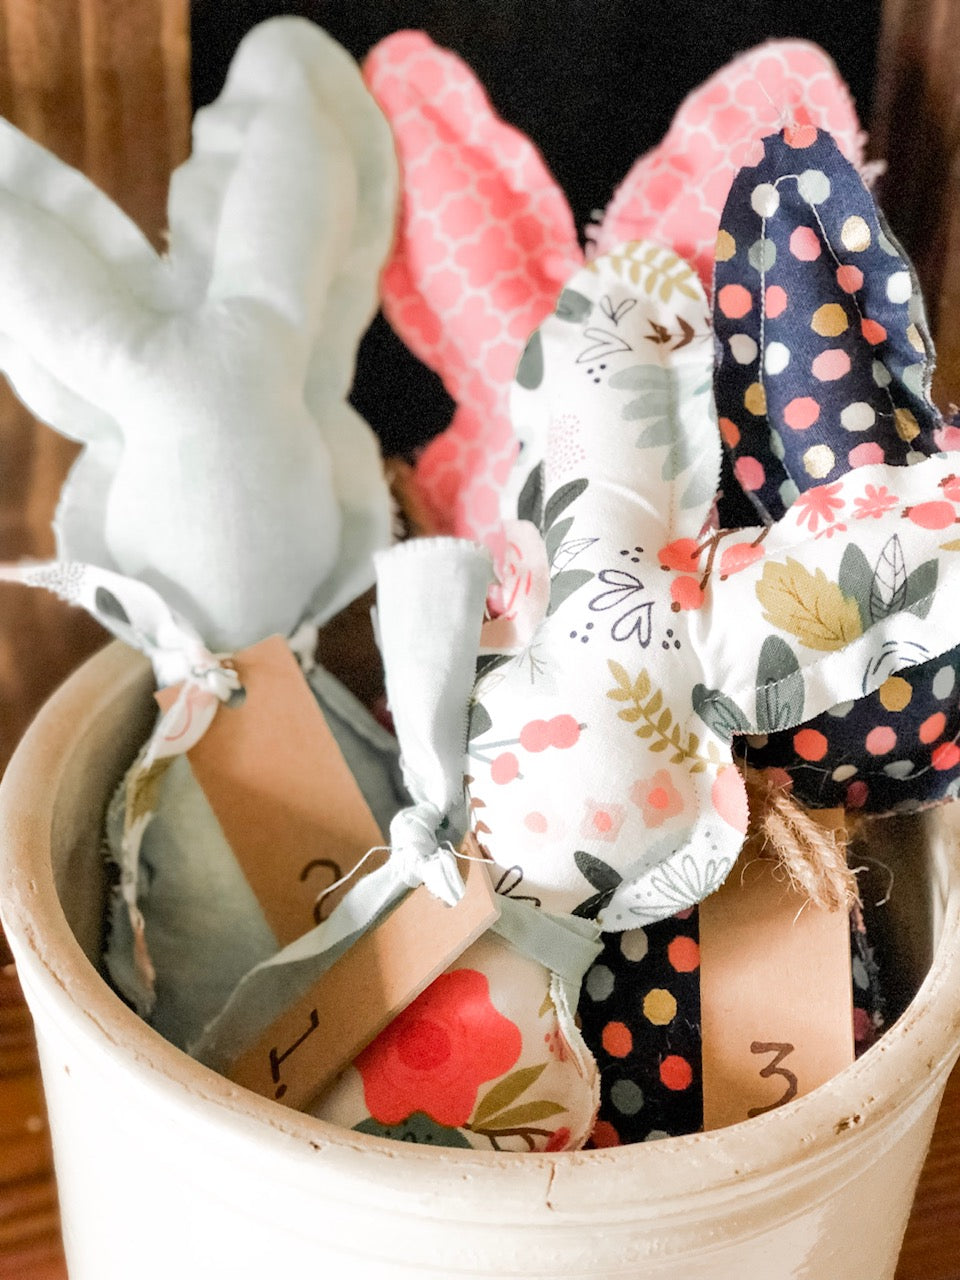
7. Now you are going to take your tags and fill in the numbers with your Cricut pen. Since this is not a writing font, the Cricut pen just draws the outlines of the numbers/letters. No worries though because all we have to do is just color it in!
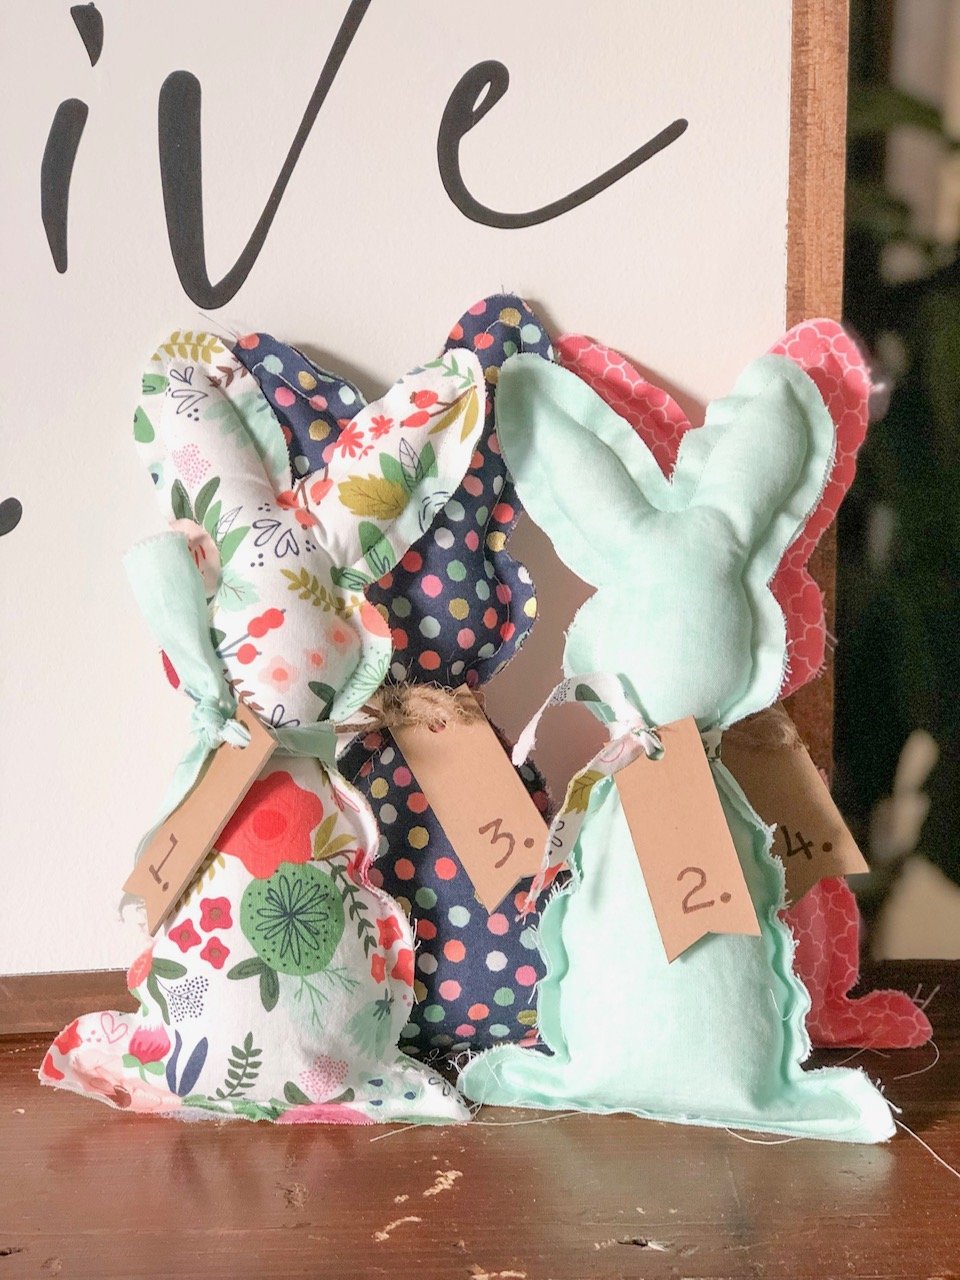
8. The next part is simply to decorate your bunny! I am using some twine and scrap fabric to wrap around the neck of the bunny. I looped my chipboard through the twine/fabric so it hangs like a tag on a collar. You can get as creative as you want here! But once you’ve done that – you’re finished! See, I told you it was simple!

I put my bundle of bunnies in a basket on this old antique cubby that I have. It’s right in the front entryway of my house and I love how it turned out! And the best part is, it was a really inexpensive craft. The fabric that I used for these came from a sample pack from Cricut. I love it because all of the patterns and colors complement one another perfectly! It came with five different pieces of fabric that are 12″x26″. That meant I got two bunnies per piece of fabric…so you can get 10 bunnies out of one sampler. That’s my kind of project – cheap and cute!


I hope you enjoyed this tutorial! We would love to see if you make any. Happy Easter!
-Courteney
Cricut Easter Project: Applying Vinyl on Eggs + Free SVG!

Comments
Leave a comment