On Orders $49+
On Orders $49+


Do you like to make your own Christmas decorations? Here is a wall hanging I made for Christmas with my Cricut Maker, using a wreath of wooden beads, a wooden round, paint and permanent vinyl. I chose colors that Christmas lights usually come in with white paint and glitter paint for the background.

Materials
Wood round
Wooden beads on a metal ring
Acrylic Paint
Glitter paint
Small metallic beads (I used silver)
Glue
Cricut Permanent Vinyl
Cricut Transfer Tape
Cricut tools
Painters tape
Ruler
I started with a quote I liked that referenced Christmas lights. I am all about colors and lots of them. In keeping with that, I selected permanent vinyl colors to match the beads. I used red, blue, green, yellow and orange. The Cricut Premium Permanent Vinyl Rainbow Colors Bundle includes all of these colors plus purple, so it would be perfect for this project.
First, I painted the wooden round and let it dry while I prepared my design. I used what I thought was white glitter paint, but it turned out to be glitter only when it dried.

I came up with Plan B, which was to paint the wooden round again with white paint and then paint over it again with the glitter paint.

While the paint dried, I went into Design Space to create the text. I inserted a circle from the Shapes menu to use as a template for my wooden round, which was 10 inches in diameter. Then I typed the text I wanted, centering it as desired.

I selected a font I liked (BFC Christmas Cards) and moved the text over the circle template for sizing purposes.

I changed the color of the text to match the beads going around the edge of the round. I used yellow twice for the two short words and arranged the words to group and attach them for cutting.

Each color would be cut on a different mat. This took a bit more time but gave me the look I was going for.

Once all the words were cut out, I weeded and trimmed around them so I could position them close to each other.

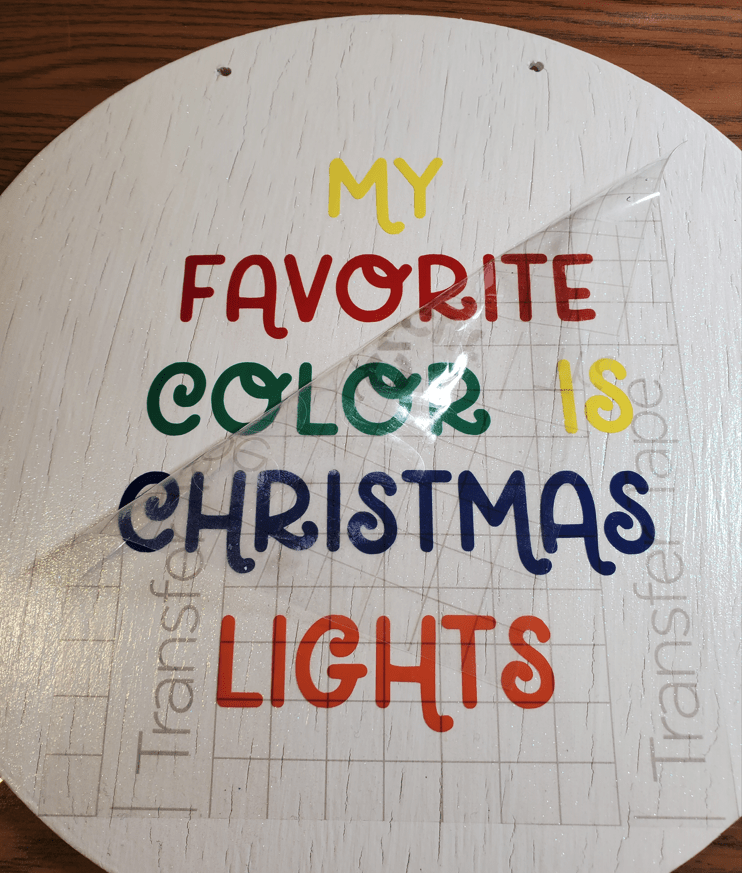
Then I applied transfer tape to adhere them to the wooden round. I first cut a piece of transfer tape a bit smaller than the round to be sure the final design would fit on it.

Then I laid the transfer tape sticky side up and started placing the individual words face down onto it, centering them the best I could. I laid the transfer tape backing underneath for easier viewing.

I burnished the vinyl onto the transfer tape with a scraper, removed the vinyl backing and placed the design over the painted round to attach it.

Once it was burnished onto the painted round, I removed the transfer tape backing.

Now I was ready to add the beads, but they needed to be painted, too. This was not one of those quick and easy projects, but it was still fun!
The wooden beads could be removed from the metal ring. I didn't realize this when I bought it, but it made things so much easier. I threaded the beads onto pipe cleaners and prepared an empty box by cutting slits in the sides for each color.

I placed the pipe cleaners into the box by sliding the ends into the prepared slits.

I painted each row of beads with a small paint brush, starting on one side and then flipping the pipe cleaners over to paint the bottom sides, putting on two coats of paint for good coverage.

Once they were all painted, I opted to spray the beads with a sealant to give them a shiny appearance.

After the beads were dry, I strung them back onto the metal ring they came on, alternating the colors in the same order as I went around.

I used a glue gun to attach the entire ring of beads to the painted wooden round.

Once the glue was dry, I again used a glue gun to add some small silver beads onto the outside edges of the painted beads to make them look like little lightbulbs. It was easier to do this after the colored beads were attached to the wooden round because they did not spin around.

Now I was ready to add some string for hanging up my Christmas Lights Wreath. I wrapped a bit of painters tape around the end of the string to get it through the holes in the wooden round more easily.

I threaded the string from back to front first and then slid the string through the space between two beads to bring it to the back again. I did not want a knot on the front of my wreath.

I tied a knot into each end on the back of the wreath to hold the string in place.

Now my wreath was done, and I hung it on the wall to see how it would look.

I love it! It's so bright and colorful. I can't wait to hang it up at Christmas time.
Two things I would change:
1) I would choose a darker color than yellow for the short words, as they did not stand out very well from a distance.
2) I would sand the wood before painting and use newer paint to try to avoid the little cracks in the white paint.
All in all, I was happy with my wreath. Using my Cricut to make holiday décor for my home is my new favorite pastime. What would you make with a Cricut for Christmas or other holidays?
Fill your home with things you love and surround yourself with beauty.
Leslie
Craft Foam Snowflakes Personalized with Cricut Vinyl
Leave a comment