DIY Sock Monkey Tutorial – Part 1 (Body & Legs)
I love sock monkeys! There is something so sweet about them, I do not believe anyone can have too many! These are the perfect gift for any little tike- perfect for a baby shower, Easter Basket filler or stocking stuffer!
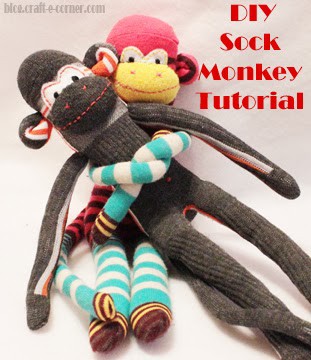
Let me show you how to make your very own sock monkey!
You will need:
•1 pair of crew cut socks, adult socks (crew cut socks would come up about half way up someone’s calf).
•Fiberfill (stuffing)
•White Felt
•Embroidery Floss
•Sewing Machine
•Pins
•Sewing Needle
•Thread
•Seam Ripper
•Scissors
•Iron
•Fabric Marker or Tailor's Chalk
Sock monkey’s take several steps so I have broken up the steps into three different blog posts! The following tutorial has lots of pictures and is step-by-step on how to make the body & legs! There will also be a tutorial on making the ears & arms and face & tail. (Link’s will be provided once they are all published!)
Let’s get started making our bodies and legs:
One stock will become the monkey’s legs & body, and the other will be used to make the arms, ears, face and tail of the monkey.

1. Turn one of your socks inside out (left or right, it doesn’t matter).
2. If you have a cuff on your sock, use a seam ripper to open up the seam and give yourself a little more space to work with. This will also cut back on your arms or legs being bulky.
3. Flatten the leg portion of the sock so that the heel of the sock is centered. Press with a iron, if desired. Sew along the green lines shown in the photo. You’ll want your sock money’s feet towards to top of the sock (near the opening). Leave a space between the legs near the heel of the sock. If you have a fabric marker or tailors chalk, you can draw out your pattern first and then sew, if desired.
4. Does your sewing machine have this type of button? My sewing machine will allow me to move the needle over so you have less than a 1/4 inch seam allowance. If you have settings like this, use them! Less seam allowance = thicker legs = a good thing.
5. Sew your legs & make sure to keep enough space between them to be able to cut down the middle (but get the seams as close as possible).
6. Cut between the legs & trim the feet with a pair of scissors.
7. Turn your sock monkey body and legs right side out by pushing your sock though the hole between the legs. You can slightly widen the hole, if necessary.
8. Stuff the monkey with fiberfill. Small tufts work best for stuffing the legs, if you use larger tufts of stuffing, it will make your legs lumpy. Lumpy legs = bad! Once you stuff the legs, gently roll them between your hands to help de-lump them.
9. How much fiberfill you put in your monkey depends on how dense you want him to be. I went for somewhere between medium and hard.
10. Sew the hole between the legs using a needle and thread. Hide your seams best that you can! I used a whip stitch to close the hole.

You can use any sock you would like- stripes, patterns, solids- whatever you desire! Length is the only concern… crew cut socks give you a long enough leg portion to make legs for your monkey!
Come back Wednesday for the ears & arms tutorial and then we will finish up with a face & tail tutorial on Friday!
If you are joining along for this journey to making your own sock monkey and have any questions, please ask! Feedback and a little blogging love is always appreciated!

FEATURED SALES